一 hook框架frida
1 | Hook 框架是一种技术,用于在运行时拦截和修改应用程序的行为。 |
1.1 下载安装
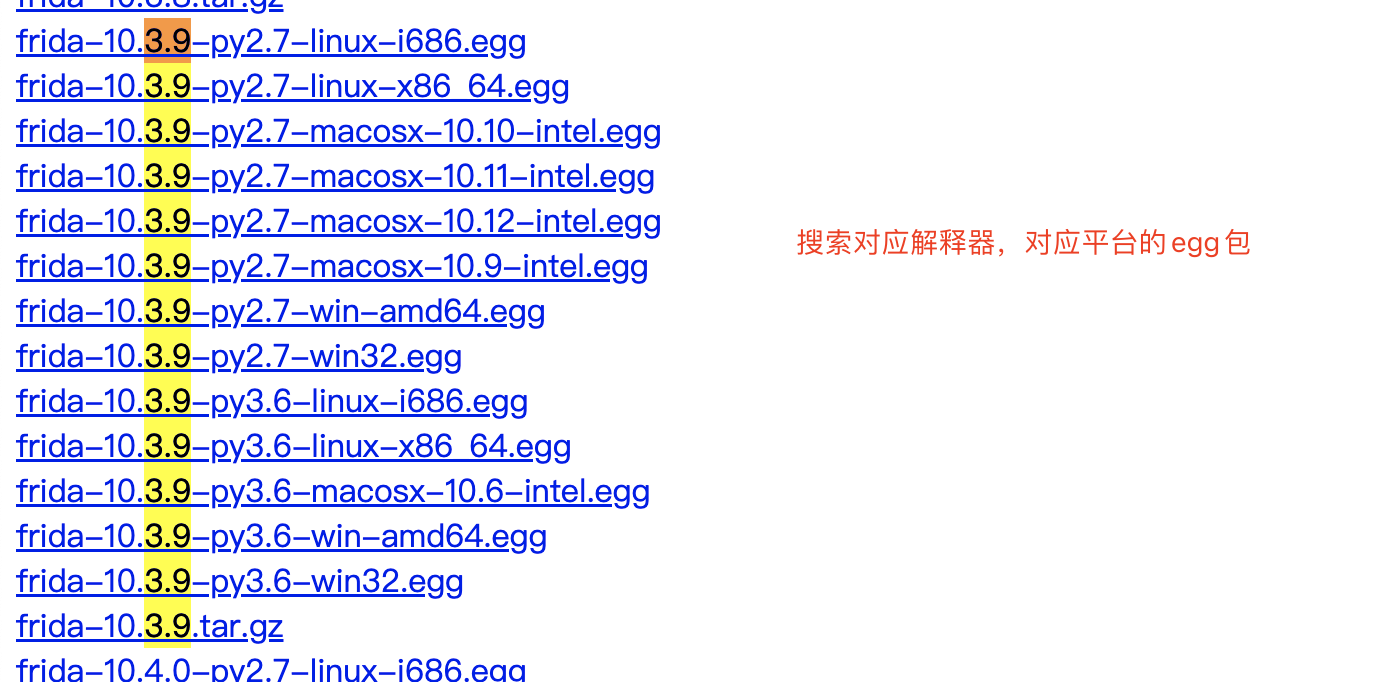
1 | # 注意:需要电脑端[电脑端要安装python解释器环境]和手机端同时安装,版本必须对应 |
1.1.1 电脑端安装
1 | # 指定版本安装 |
1.1.2 手机端安装frida-server
1 | # 1 先查看手机架构 |

1.2 启动并hook应用
1.2.1 手机端启动frida服务端
1 | # 切换到手机的/data/local/tmp目录下 |
报错解决
1 | 方案一:重启手机 |

1.2.2 电脑端配置
1.2.2.1 配置端口转发
1 | # 方式一:命令行中敲 |
1.2.2.2 编写python代码,打印手机中的进程
1 | # 枚举手机上的所有进程 & 前台进程 |
错误
1 | # 没有配置端口转发 |

1.3 hook 某智赢的加密算法encodeMD5
1 | # 下载地址:https://appdownload.che168.com/usedcar/csy/index.html?pvareaid=106101 |
1 | import frida |
1.4 Python Hook方式
1 | # Spawn 方式适应场景:Spawn 方式是在目标应用程序启动时直接注入 Frida 的 Agent 代码 |
1.4.1 attach方式(手动操作)
1 | import frida |
1.4.2 spawn方式(自动重启app,适用于在应用程序启动的早期阶段进行)
1 | import frida |
1.5 js Hook方式javaScript+终端
1 | # 代码 hook.js |
1.5.1 attach,先启动app,然后再在终端执行:
1 | frida -UF -l hook.js |
1.5.2 spwan,脚本自动重启APP并进行Hook
1 | frida -U -f com.che168.autotradercloud -l hook.js |
二 使用python还原算法
1 | # 加密分类 |
2.1 md5
1 | import hashlib |
2.2 sha
1 | import hashlib |
2.3 DES加密
1 | # pip3 install pycryptodomex -i https://pypi.douban.com/simple |
2.4 非对称加密算法-RSA
1 | # 安装模块 |
2.5 base64
1 | import base64 |
三 抓包逆向案例
3.1 金树林.apk
3.1.1 目标
1 | # 发送验证码 |
3.1.2 发送验证码
1 | import urllib3 |
3.1.3 注册
1 | # 请求地址:https://miappshop.jshulin.com/memberLogin/memberRegister |
3.1.4 登录
1 | import requests |
3.1.5 登录后查询商品
1 | import requests |
3.1.6 补充(请求参数转字典,请求头转字典)
1 | # 今日南川app登录 |
3.1.7 补充 url编码解码
1 | from urllib import parse |
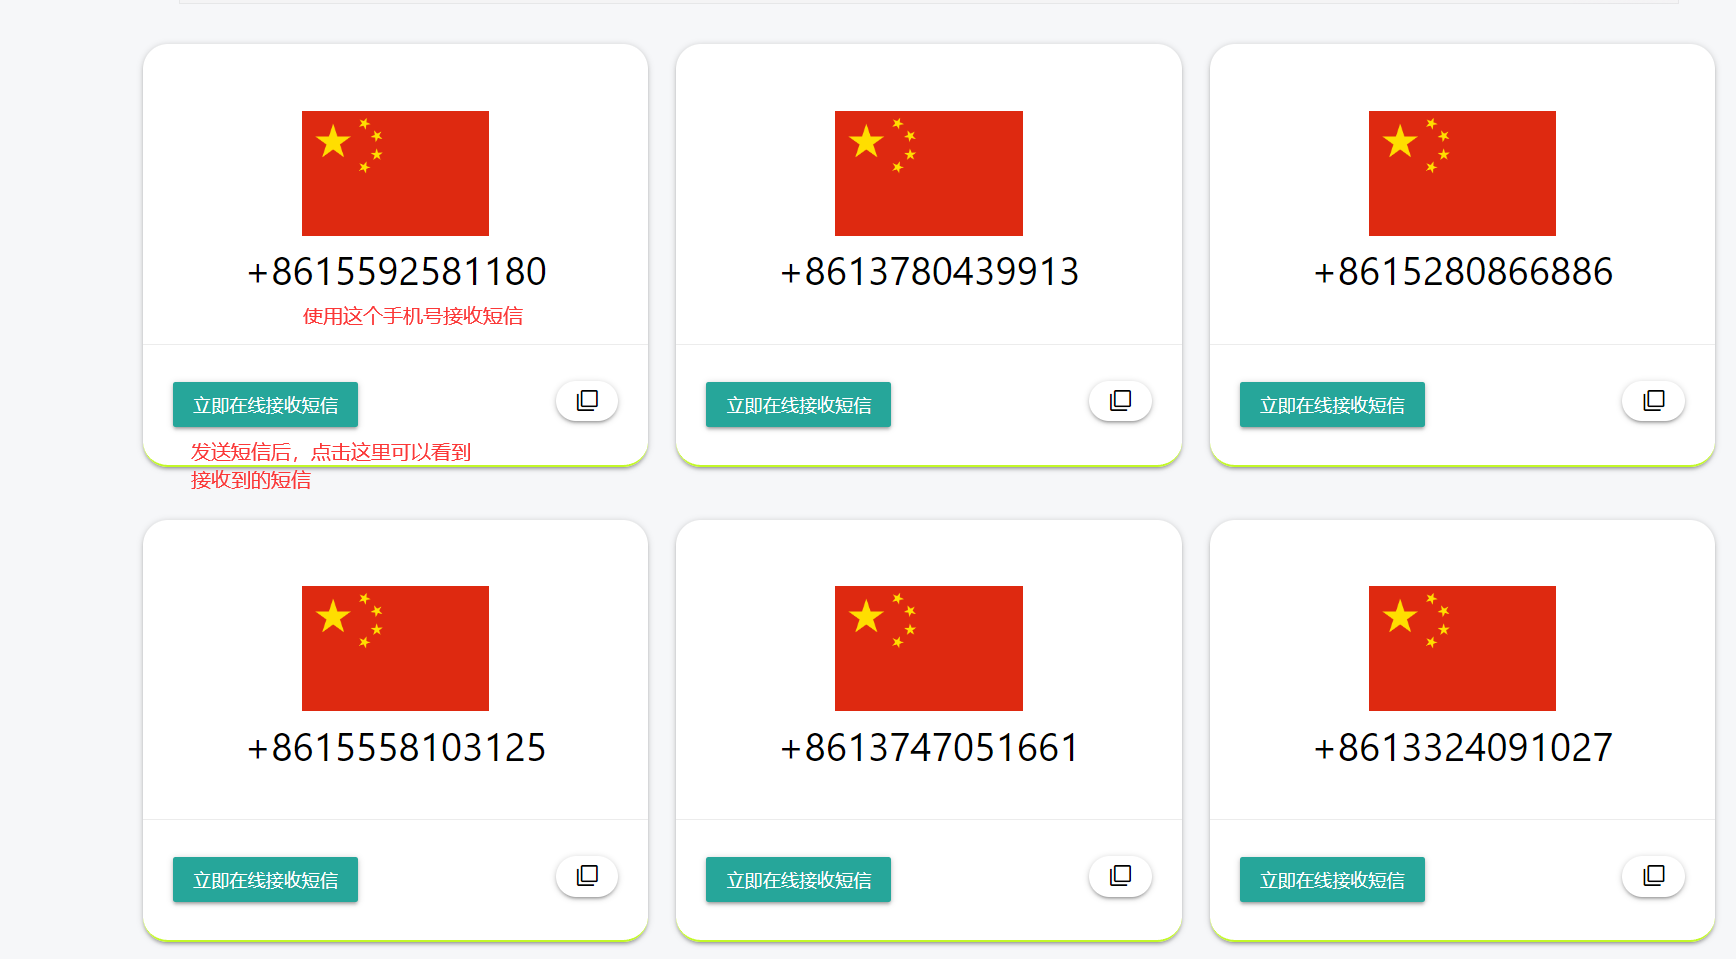
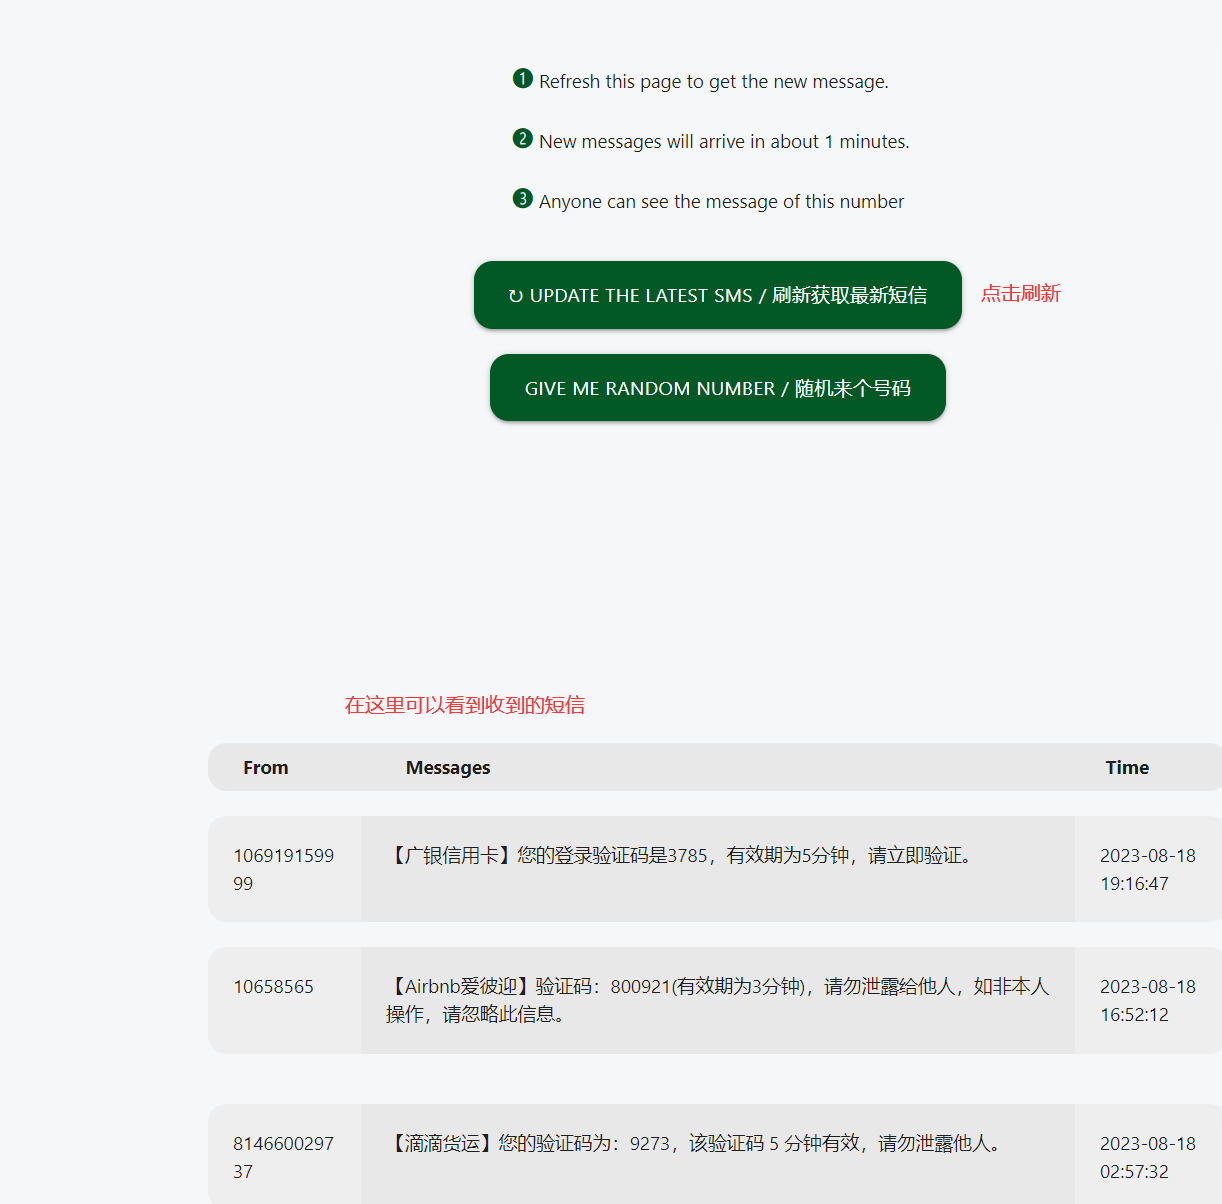
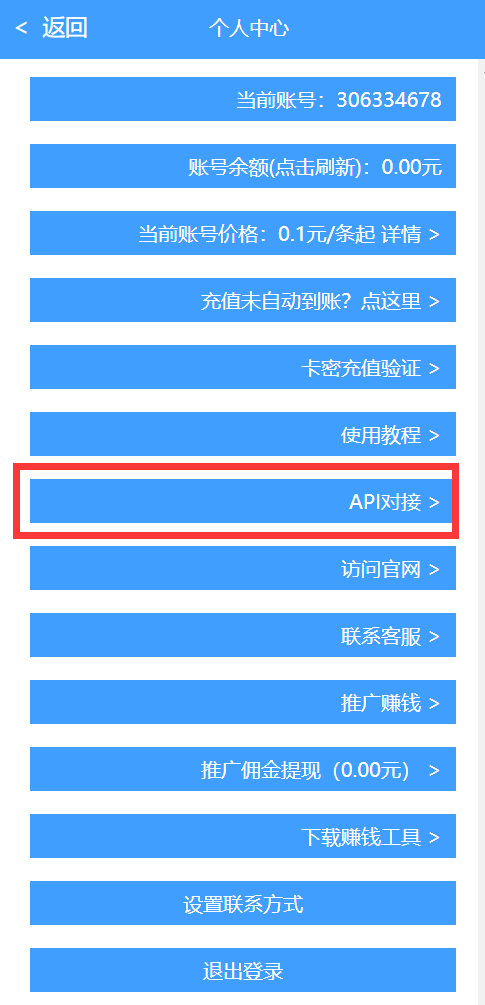
3.1.8 补充接码平台
1 | # 免费收费大全 |


3.2 爱安丘.apk(v228)
3.2.1 目标
1 | #1 发送验证码登录(抓包) |
3.2.2 IMEI
1 | IMEI(International Mobile Equipment Identity)是【国际移动设备识别码】的缩写,它是一个唯一标识符,用于识别移动设备,如手机、平板电脑等。IMEI由15位数字组成,每一位都有特定的含义 |
3.2.3 验证码登录(老版本v228)
1 | import random |
3.2.4 验证码接收
1 | # 可以接收手机验证码的平台---》这些东西违法--》小心点 |


3.2.5 验证码登录(v228)
1 | import requests |
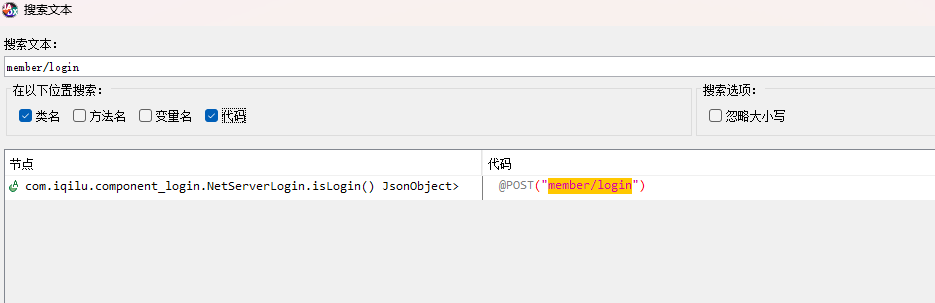
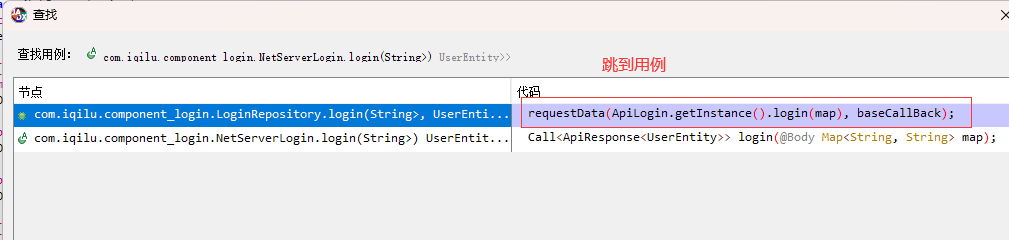
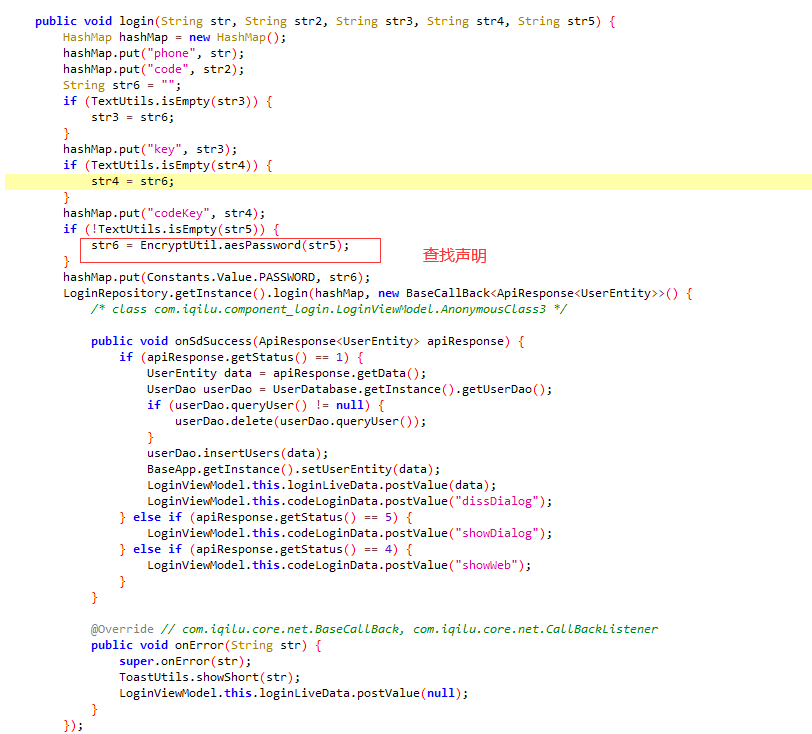
3.2.6 手机号密码登录(新版本最新版)
1 | # 用户名密码登录 |
反编译,找位置(根据地址:member/login)

**
hook.py
1 | ####1 手机端启动frida-serve |
用户名密码登录代码
1 | import requests |
utils.py
1 | import random |
四 抓包反编译案例
4.1 X大夫
4.1.1 目录
1 | # 模拟登录 |
4.1.2 操作步骤
1 | #1 请求地址 |

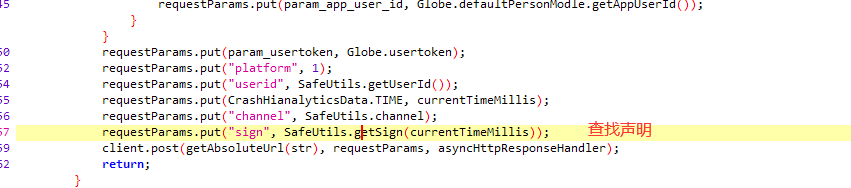
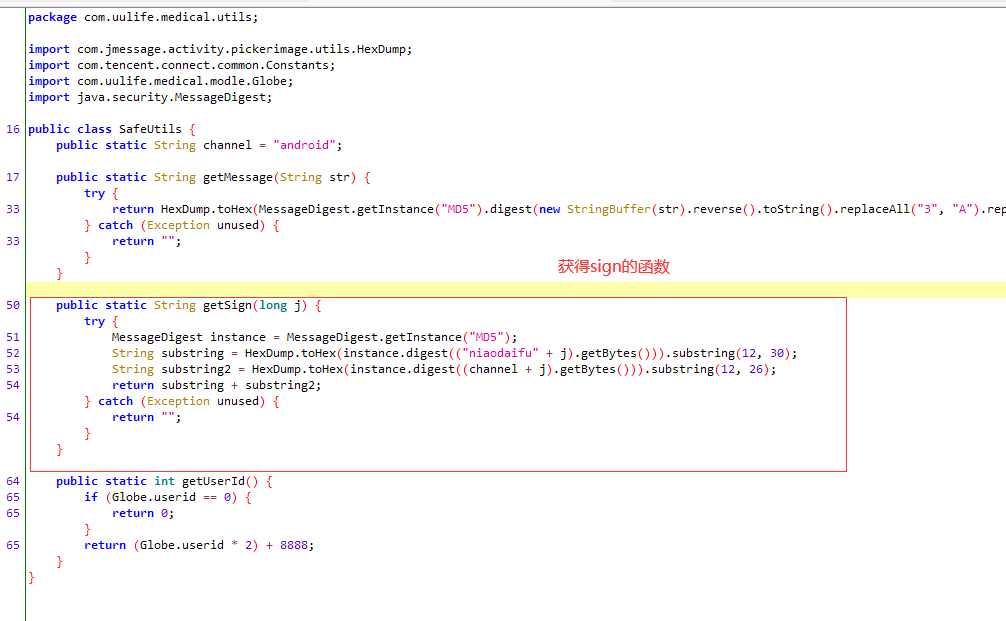
4.1.3 实现代码
1 | import requests |
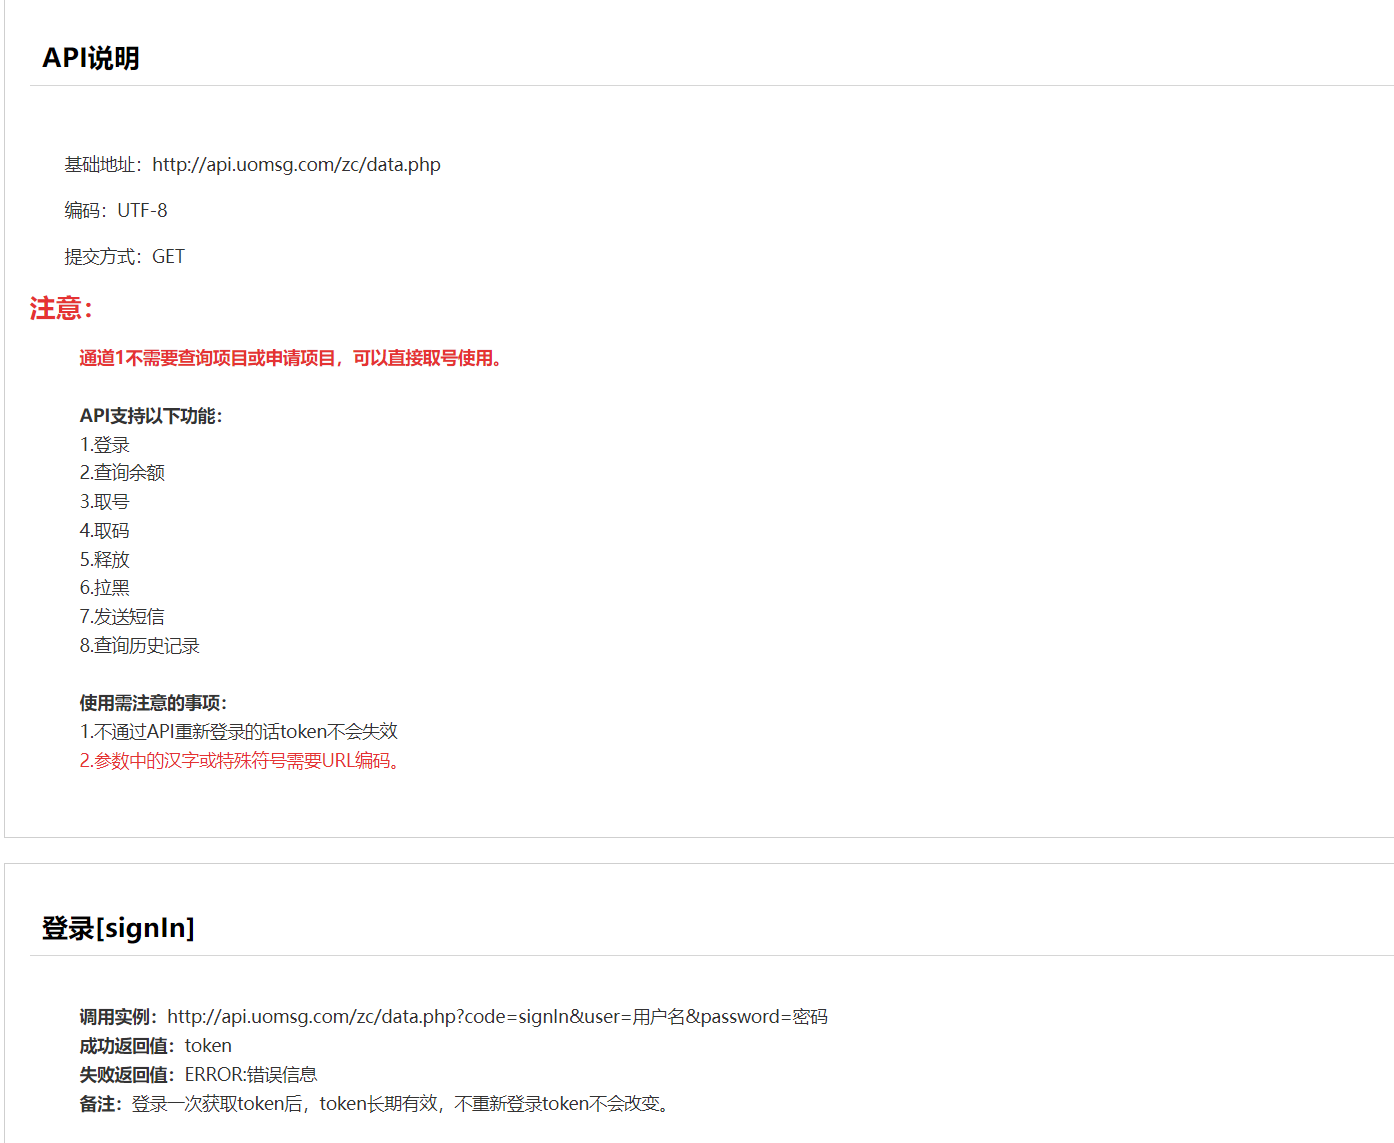
4.2 油联合伙人
4.2.1 目标
1 | # 登录 |
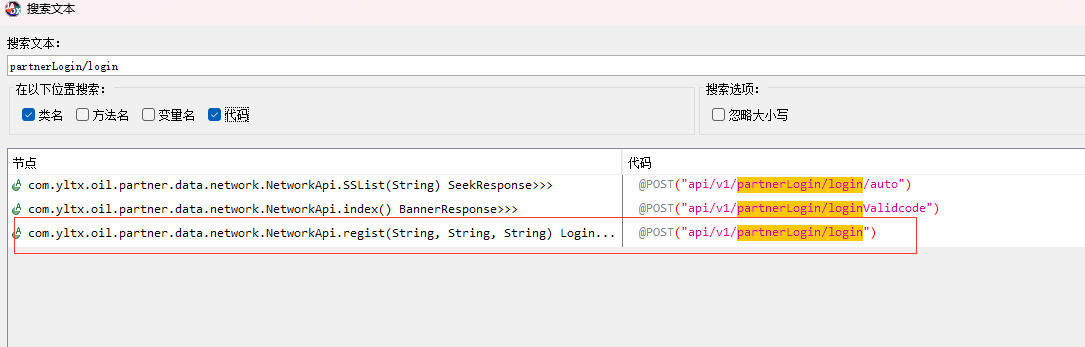
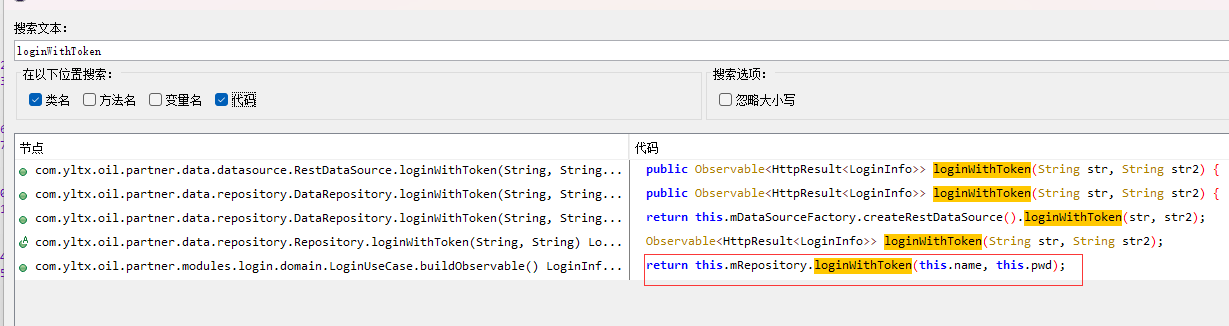
4.2.2 密码破解操作步骤
1 | # 1 抓包 |


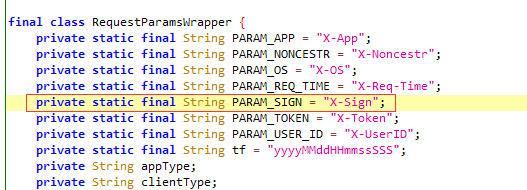
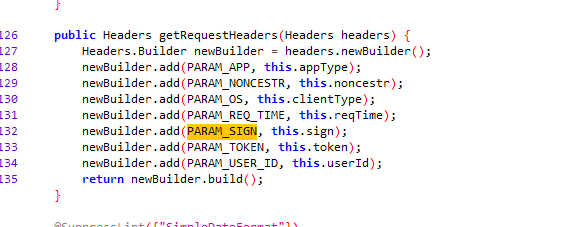
4.2.3 签名的破解步骤
1 | # 1 搜索 X-Sign |
4.2.4自动登录代码如下
1 | import requests |
__END__
