1
2
3
4
5
6
7
8
9
10
11
12
13
14
15
16
17
18
19
20
21
22
23
24
25
26
27
28
29
30
31
32
33
34
35
36
37
38
39
40
41
42
43
44
45
46
47
48
49
50
51
52
53
54
55
56
57
58
59
60
61
62
63
64
65
66
67
68
69
70
71
72
73
74
75
76
77
78
79
80
|
import frida
import sys
rdev = frida.get_remote_device()
session = rdev.attach("司小宝")
scr = """
Java.perform(function () {
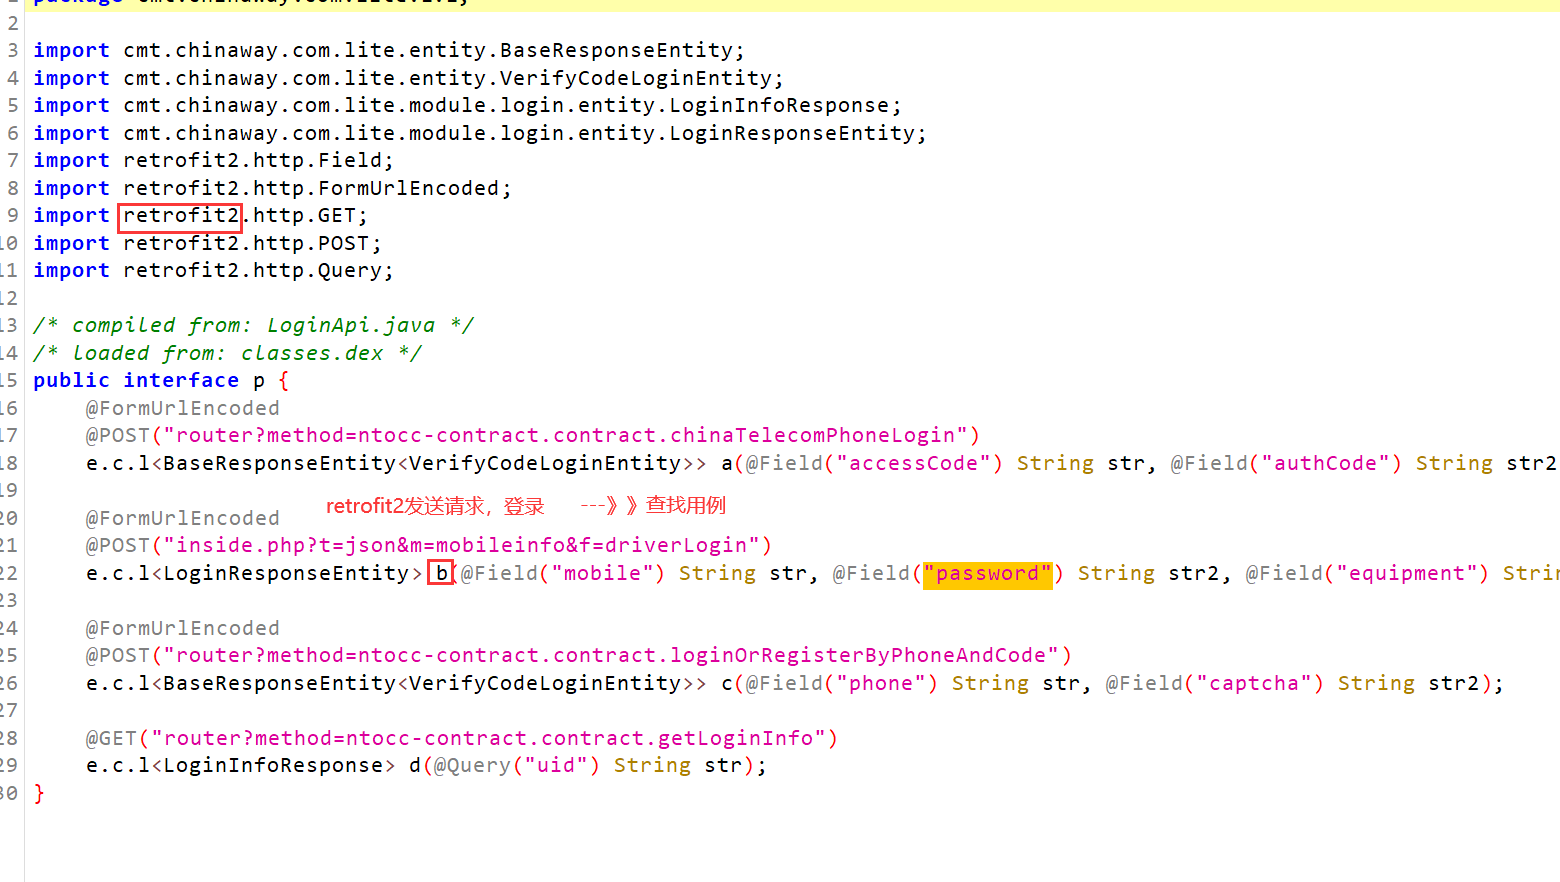
var p0 = Java.use("cmt.chinaway.com.lite.q.p0");
p0.a.implementation = function (str, str2, str3,str4) {
console.log("---------------------")
console.log(str, str2, str3,str4);
var res = this.a(str, str2, str3,str4);
console.log(res);
return res;
};
});
"""
script = session.create_script(scr)
def on_message(message, data):
print(message, data)
script.on("message", on_message)
script.load()
sys.stdin.read()
'''
### 如果app运行了,会报这个错--》没hook到
报错了:frida.ProcessNotFoundError: process not found
### 如果app没运行:会包这个错
frida.ProcessNotFoundError: unable to find process with name '司小宝'、
## 司小宝 做了frida的反调试
1 删so文件 :在so文件中做了frida检测
2 使用hulda:做了 frida关键词的检测
3 使用ptrace占坑
'''
Java.perform(function () {
var p0 = Java.use("cmt.chinaway.com.lite.q.p0");
p0.a.implementation = function (str, str2, str3, str4) {
console.log("---------------------")
console.log(str, str2, str3, str4);
var res = this.a(str, str2, str3, str4);
console.log(res);
return res;
};
});
// frida -U -f cmt.chinaway.com.lite -l 3-spawn方案hook.js
/*
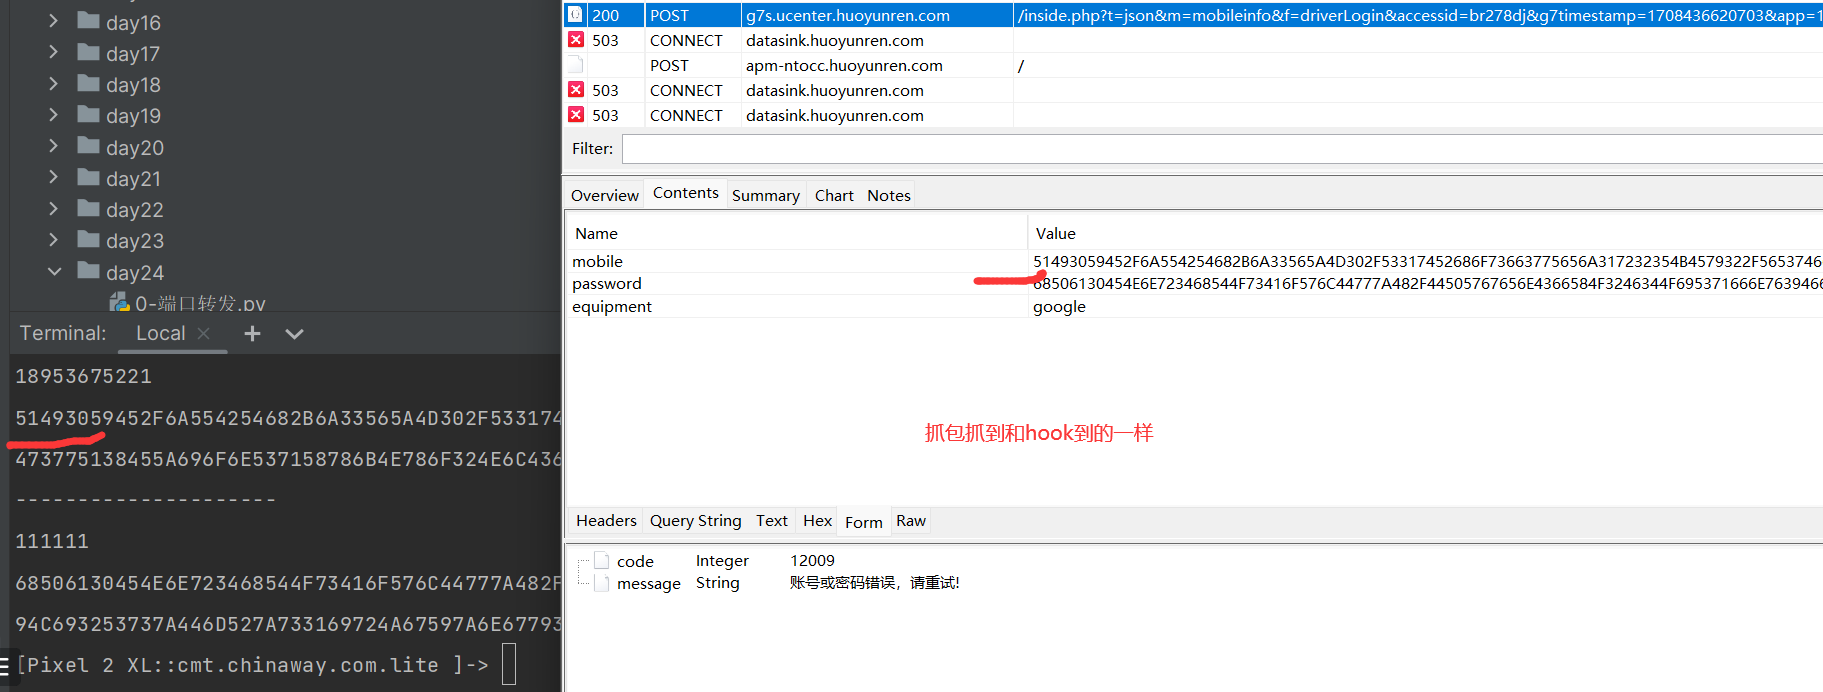
str:1KMrg0dfufc0wpnXEJacEQX1YEUYA0Ja
str2 :"POST
str3: 1708434407419
str4: inside.php
1KMrg0dfufc0wpnXEJacEQX1YEUYA0Ja POST 1708434407419 inside.php
I2BPfr1R3%2B9rLwO4deIcMq7Urbg%3D
*/
|